Flash CS6 is a platform for multimedia.
- With this multimedia platform, we can create digital animation, rich web applications, websites, movies and etc.
- Mostly these are used for creating games and advertisements.
- Examples are Minesweeper, Pac Man, Tetris, and Bejewelled.
- Some of the famous movies created using flash are Off-Mikes, Gotham Girls, CrimeTime, and Homestar Runners.
Starting Flash CS6 –
To start Adobe Flash Professional CS6, choose the Start button > All Programs > Adobe Production Premium CS6 > Adobe Flash Professional CS6.

Exploring the interface of Adobe Flash Professional CS6 –
- We have options such as Stage, Tools panel, Timeline panel, Properties panel, menubar, and application bar.
- We can create and edit interactive websites, digital animations from this interface options.

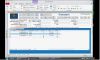
Workspace –
- An application screen is the main screen in flash CS6.
- Based on the primary usage you can change the layout and arrangement of the panels.

Stage –
- It is the area where the activities are performed while viewing a movie.
- The grey colour area surrounding the Stage is called Pasteboard.
- Anything in the Pasteboard is not visible in the final output.
- The colour and size of the Stage can be changed by using the options in the New Document dialog box and the Properties panel.

Tool section –
Selection Tool - Used to select an object, group of objects, strokes, and fills by double clicking on the object.
Snap to Objects - This snap to object helps the selected object to move in the Stage to the edge of the nearest object.
Smooth - This smoothens the edges of the selected object.
Straighten - This sharpens the edges of the selected object.

Subselection Tool - This tool helps to change the shape of an object.
Free Transform Tool - The Free Transform Tool is used to rotate, move, skew, and distort an object.
Rotate and Skew - This gives oblique direction to the selected object.
Scale - This tool helps to scale the selected object.
Distort - By dragging individual transform points we can deform the shape of an object
Envelope - Used to manipulate the shape of an object
Lasso Tool - We can select an object or a part of it by creating outlines
Magic Wand - It can select the areas that contain similar colors.
Polygon Mode - It can select an area by creating linear and interconnected lines.
Pen Tool - The Pen Tool is used to draw shapes and paths with anchor points.
Text Tool - This tool helps to write text in a text box.
Line Tool - This helps to draw a straight line.
Rectangle Tool - The Rectangle Tool is used to draw a rectangular shape.
Oval Tool - We can draw oval shapes with this tool.
Pencil Tool - The Pencil Tool is used to draw lines and shapes.
Straighten - The Straighten mode is used to draw straight lines.
Smooth - The Smooth mode is used to draw smooth curved lines.
Ink - The Ink mode is used to draw freehand lines.
Brush Tool - The Brush Tool is used to draw brush-like strokes.

Spray Brush Tool - This tool helps to colour using free strokes.
Paint Bucket Tool - This is used to colour a closed path or area.
Eyedropper Tool - The Eyedropper Tool is used to pick the fill and stroke hexadecimal values.
Eraser Tool - The Eraser Tool is used to erase a section of the artwork in the Stage.
Hand Tool - We can move the stage using this hand tool.
Zoom Tool - Used to maximize and minimize the stage.
Fill color, Stroke color, Black and white color and swap colors – Used to colour the objects on the stage.
Timeline Panel - The animations that we have created can be seen in the timeline.

New Layer - This button is used to create a new layer.
New Folder - This folder is used to create folders and save the files inside the folder to organize layers.
Delete - The highlighted or selected layers can be deleted using the delete button.
Go to first frame - On clicking this icon it takes you to the Playhead on frame 1 in the Timeline panel.
Step back one frame - On clicking this icon it takes you to move the Playhead backward by one frame from the current frame.
Play - The Play button is used to play the animation in the Stage.
Step forward one frame - On clicking this icon it takes you to move the Playhead forward by one frame from the current frame.
Go to last frame - The Go to last frame button is used to place the Playhead on last frame of the animation in the Timeline panel.
Center Frame - The Center Frame option is used to center the Timeline on the current frame.
Loop - The Loop button is used to specify a range of frames to play repeatedly during animation.
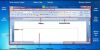
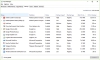
Saving Flash Document - To save a Flash file, choose File > Save or Save as from the menubar; the Save As dialog box will be displayed. The default format for saving a flash file is FLA. However, you can change it to the XFL format.

Recap
Flash CS6 is a platform for multimedia.
With this multimedia platform, we can create digital animation, rich web applications, websites, movies and etc.
Starting Flash CS6 –
To start Adobe Flash Professional CS6, choose the Start button > All Programs > Adobe Production Premium CS6 > Adobe Flash Professional CS6.
Exploring the interface of Adobe Flash Professional CS6 –
- We have options such as Stage, Tools panel, Timeline panel, Properties panel, menubar, and application bar.
- We can create and edit interactive websites, digital animations from this interface options.
Try to recollect the tools used as CS6 – Pen, Lasso, eraser, etc
Saving Flash Document
- To save a Flash file, choose File > Save or Save as from the menubar; the Save As dialog box will be displayed.