Introduction
With respect to class 5 MS PowerPoint, PowerPoint is a presentation program developed by Microsoft. It is a part of the Microsoft office.
It provides facilities to create digital slide shows. You can include multimedia contents like pictures, audio, video clips and animations in it.
Like a movie consists of various scenes, a presentation consists of a number of slides. Each slide can contain text, graphics, audio and video to convey the idea.
Creating a Presentation
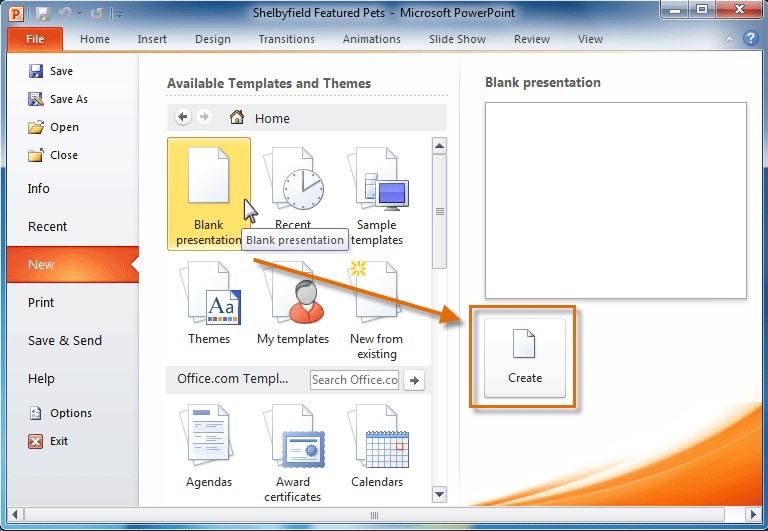
You can create a presentation, starting with a blank slide and developing further by adding contents as well as backgrounds and applying font formatting.
Developing the title slide
With respect to class 5 MS PowerPoint, how to develop the title slide:
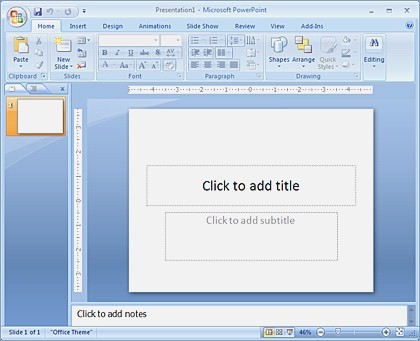
Step 1: click on the placeholder where ' click to add title' is mentioned. Type the main topic of your presentation here.
Step2: Click on the placeholder where ' click to add subtitle' is mentioned. Type more matter about the presentation.
Changing font properties of the text
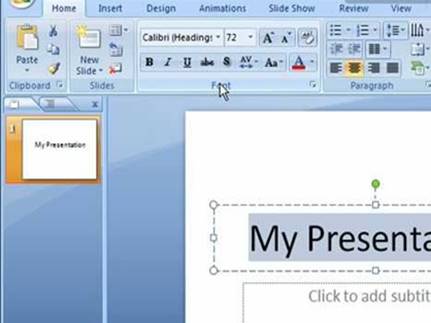
With respect to class 5 computer lessons, the text you type can be formatted in a number of ways to look attractive. Many types of font formatting like font style, size, color and effects can be applied.
To change Font properties of the text:
Step1: select the text.
Step2: click on the home tab.
Step3: click on any button in the Font group to get the desired result.
Inserting Smart Art
A smart art graphic is a visual representation of your information and ideas.
With respect to class 5 computer lessons, how to insert smart art graphic in a slide:
Step1: in the content placeholder, click the insert SmartArt graphic icon.
Step2: the SmartArt gallery opens. Select a category and the SmartArt type.
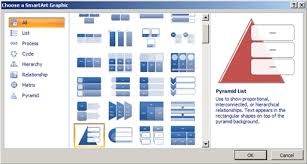
Step3: The SmartArt will get inserted. Add text in the placeholders of the SmartArt graphics.
Adding clip art
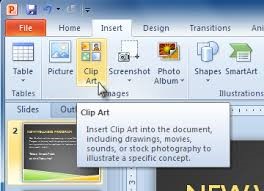
PowerPoint has its own collection of Cliparts. However, you can also select them through the internet.
With respect to class 5 MS PowerPoint, how to add a clipart, Click on the clipart button in the Illustrations group of the insert tab. A dialog box will appear on the right side of the window, search the clipart that you want to insert and click OK button.
Adding the picture from a file
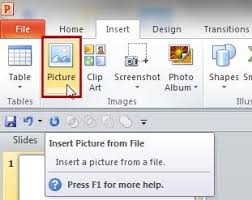
With respect to class 5 computer lessons, you can add your own pictures which you have scanned or downloaded from the internet by clicking on the insert picture from the file icon in the content placeholder.
Adding shape to your presentation
With respect to class 5 computer lessons, to insert a shape, place the cursor where you want to insert it. Click on the shape button in the Illustrations group of the insert tab. select the shape from the drop-down list that you want to insert and click OK button. You can adjust the size of the shape according to your need.
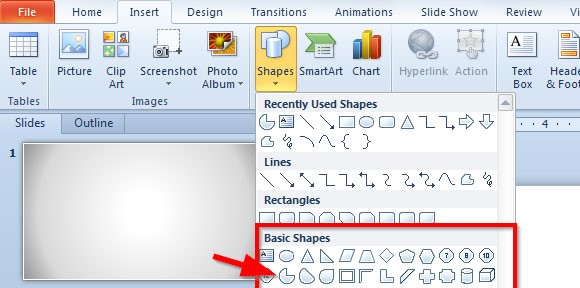
Working with the textbox
The placeholder containing the text is called the textbox. To move the text box, click on the text in the placeholder. A border will appear around the text. Position the pointer on the border, drag the mouse to move the text enclosed in the border.
Adding header and footer
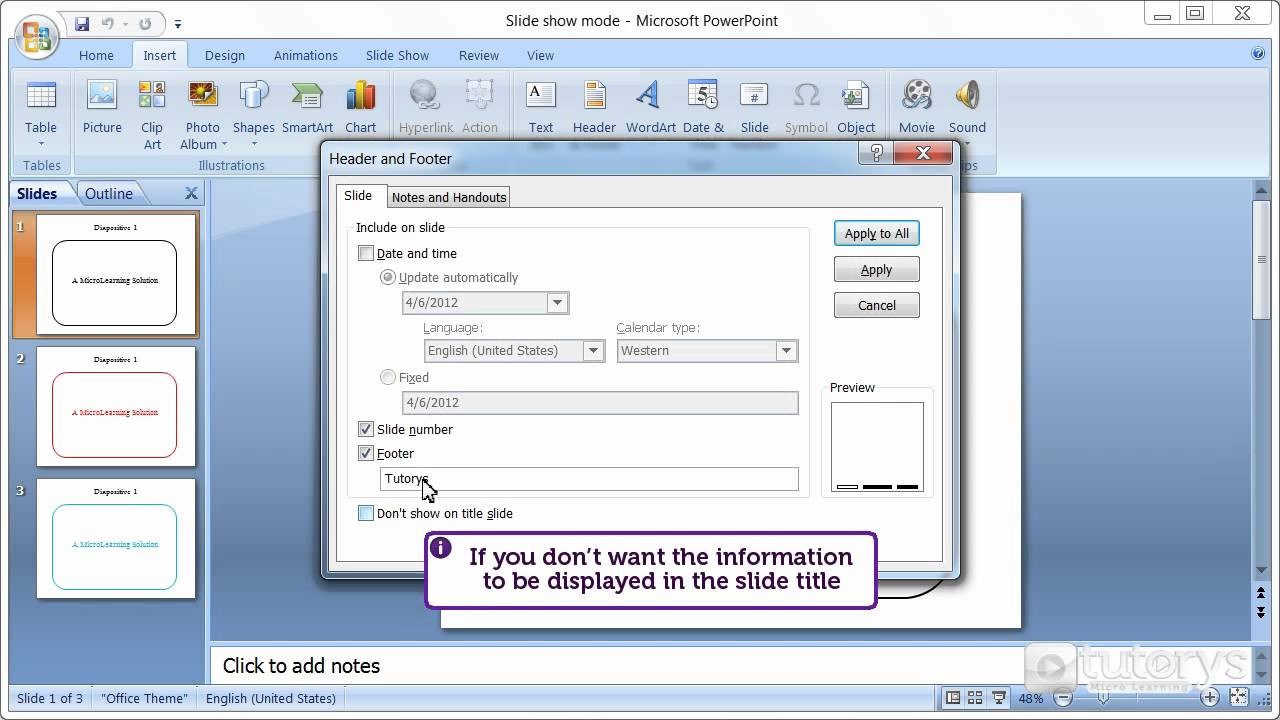
- To insert a header, click on the header and footer button in the text group of the insert tab. A dialog box will appear. Select the type of header that you want to insert and then, click on the header placeholder and type the text.
- To insert footer, click on the header and footer button in the text group of the insert tab. Select the type of footer from the drop down that you want to insert and then, click on the footer placeholder and type the text.
With respect to class 5 MS PowerPoint, various views of the presentation
Your presentation can be viewed through various views options in the PowerPoint. Each view has its own use. You can then view buttons at the bottom right corner of the PowerPoint window.
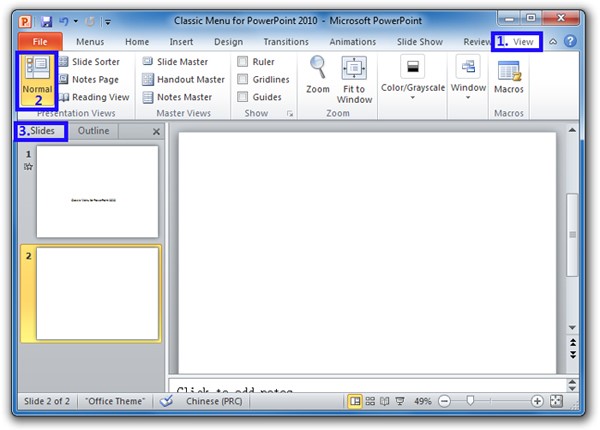
Normal view:
It is the main editing view, in which you type and design your presentation.
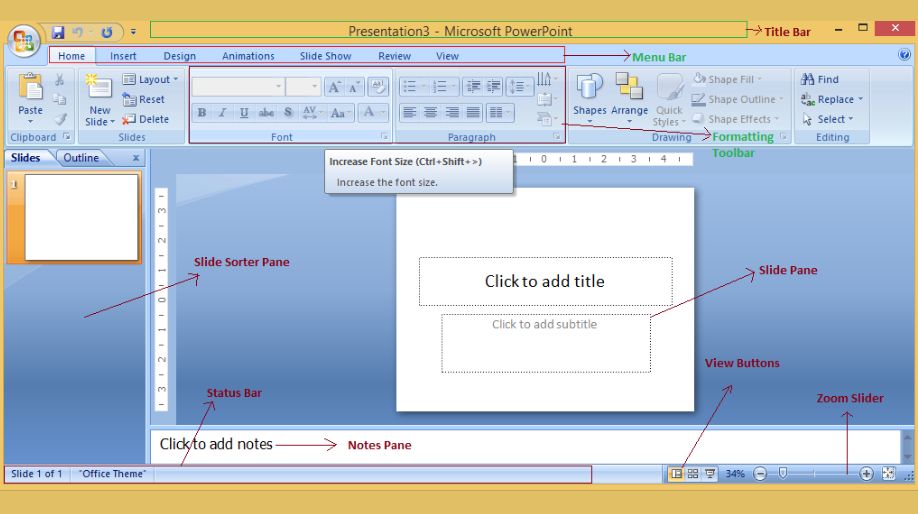
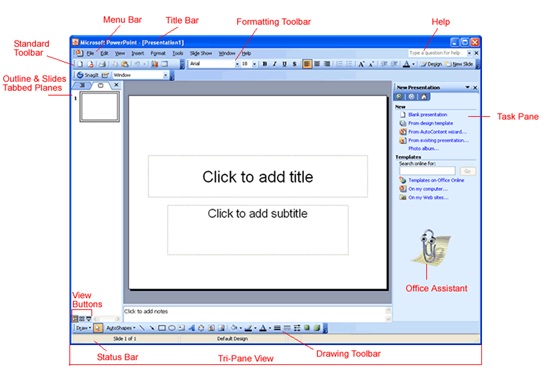
This view has three working areas:
- on the left, there is an outline pane.
- on the right, the slide pane displays a large view of the current slide.
- at the bottom, in the notes pane, you can type notes that are required to accompany a slide.
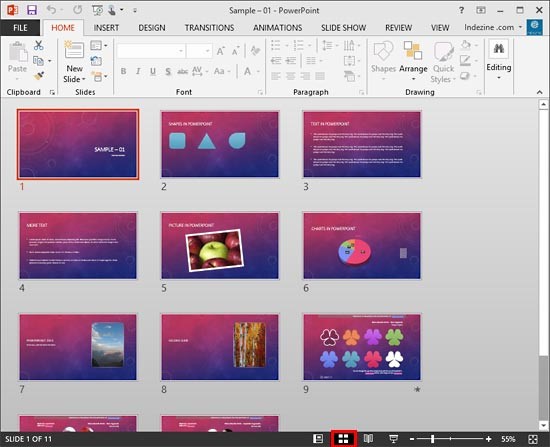
Slide sorter view with respect to MS PowerPoint
- Slide sorter view is a view of all slides in a presentation in thumbnail form.
- It gives you an overall picture of the presentation, making it easy to reorder, add, or delete slides.
- Reordering of slides is easy in the slide sorter view as you can see the thumbnails of all the slides together. You just need to drag and drop the slides to the reorder.
Slideshow view:
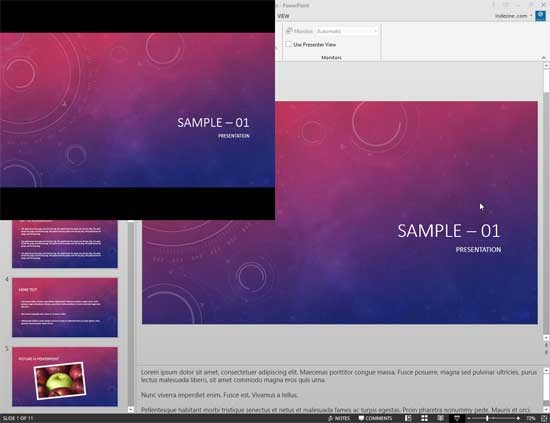
- Slideshow view is the full-screen view in which you see your presentation the way your audience will see it.
- You can see how your graphics, animation effects and timings look during the actual presentation.
- When you click on the slideshow view button, the slideshow starts from the current slide.
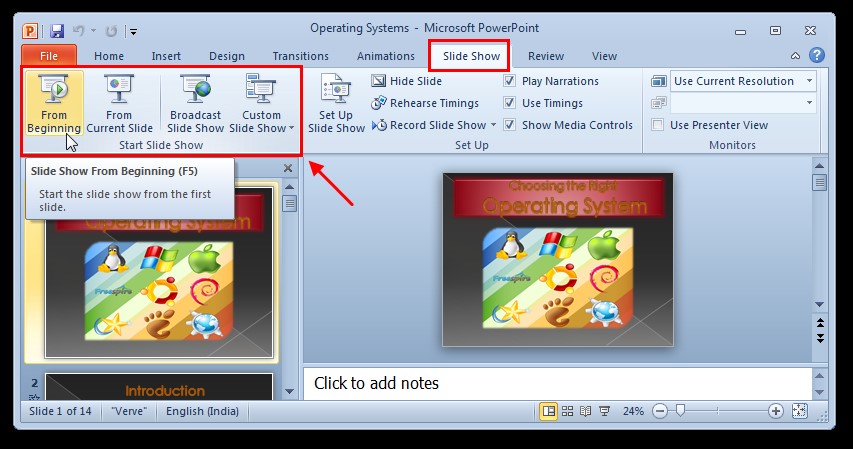
How to Run a Slide Show?
- After completing your presentation, click on the slideshow tab.
- Then, click on the ' from the beginning' tab. Your slideshow will start.
- Then press Esc key when your presentation ends to return to normal view.
Recap with respect to class 5 MS PowerPoint
- PowerPoint is a presentation program which facilities to create digital slide shows. Each slide can contain text, graphics, audio and video to convey the idea.
- You can create a presentation, starting with a blank slide and developing further by adding contents.
- To change Font properties of the text: select the text, click on the home tab and click on any button in the Font group to get the desired result.
- To insert a picture, clipart, shape and SmartArt in your presentation, click on the respective button in the Illustrations group on the Insert tab.
- To insert header and footer, click on the header and footer button in the text group in the Insert tab.
- Various views of the presentation are a normal view, slide sorter view and a slideshow view.
- To run a slideshow, click on the 'from the beginning' button of the slideshow tab.

